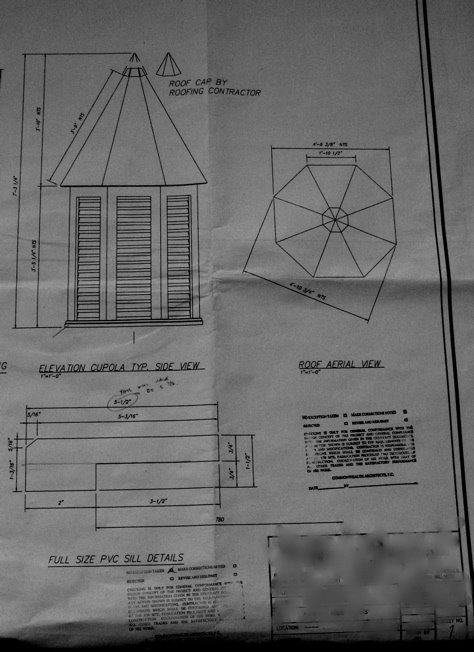
Here is a part of the final drawing for the cupolas. Our shop has a full-time draughftsman who produces these. We also have the ability to print full-size drawings of any element within the overall drawing. Sometimes I glue full-size drawings to a piece of 1/4" material for use as a tracing or routing template.
The cupolas are huge; roughly 7' tall by nearly 5' wide at the underside of the roof. They're going on an old school in Richmond's east end and are near-exact reproductions of the original cupolas which have rotted away to nearly nothing.
 My first step was to make pressure-treated plywood bases upon which everything else would be built. To do this, I cut 1/8 of the octagon size I needed from a scrap of ply. Then I traced that piece four times onto the piece of scrap 1/2" MDO you see above. I trimmed the resulting template on the bandsaw, then perfected the lines with a straight edge and router.
 Whenever I make templates, I like to make one half of the final size I require. See how the template is marked for right-sidedness? I traced five of the pressure-treated ply halves with that side facing up and five with the reverse side up. That way, any minute imperfections in the template are mirrored side-to-side.

Here are the five pressure-treated ply bases. I used the template to flush-trim the halves on the router table. The halves are joined together with #20 biscuits and the 1/2" ply scabs you see in the photo.
 The sill that wraps around the ply bases has several parts. The lowest section is depicted above. It, like much of this project, is made from PVC. We can't get 1 1/2" thich PVC for some reason, so I had to laminate two 1 x 6's together to get the stock I needed. We used a shaper to create the rabbet and the router table to make the bevel. No big deal, but when you're making five octagons, you need 40 of each part you make (8 sides x 5 octagons = 40). By the way, yes, the bevel is a little crooked on the above piece, but happily, PVC dresses very neatly with a block plane.
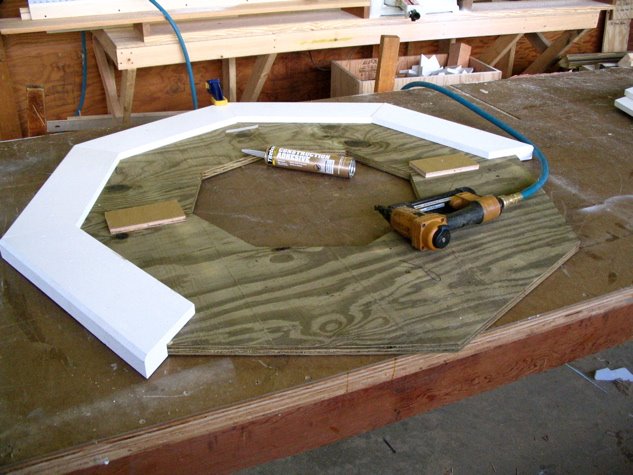
Here the sill elements are attached to the ply bases. I used construction adhesive and long staples. I worry that any fasteners I use will eventually rust away to nothing, so I'm using some kind of adhesive whenever feasible.
No comments:
Post a Comment