Sunday, November 26, 2006

Arched Jambs and Raised Panel Doors

Since finishing that set of cupolas, I haven't had anything really major to sink my teeth into. I did make three frame and panel doors last week; they were a rush job, and pretty big, but I got them done in two days. They're pictured below. Other than that I've been working on a set of five arched door jambs with lots of trim, key blocks and whatnot. I'll post more about those soon.


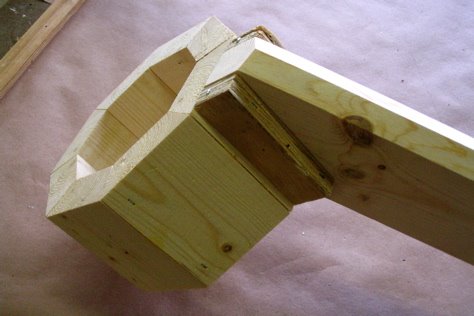
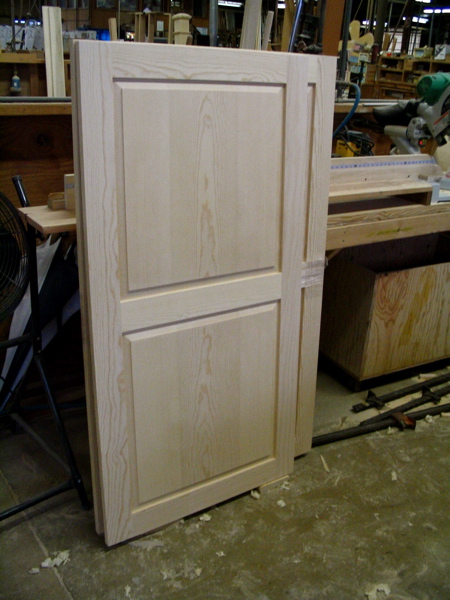
Here is one of the three completed white pine frame and panel doors. These were all about five feet tall and ranged in size from 24" to 36" wide. In the absence of our shaper man, we're trying to switch everything we can to the router table. I think it's the right move. Using a shaper for little beads and whatnot is like using a sledgehammer to squash a mosquito. We got a router bit to raise the panels for these doors, and it worked like a champ. I made two passes, and even the cross-grain cuts were nice and clean.


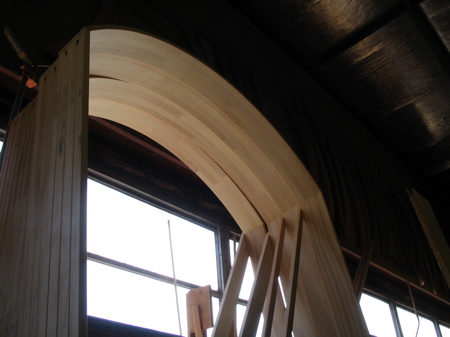
I mentioned that I'm working on several arched jambs. The picture above shows a set I did about six months ago. When I arrived at the shop, arches like this were done by stacking and butt-jointing strips of white pine, assembling them, then bandsawing and sanding the curve. That's more or less the way that curved drawer fronts have traditionally been made. I find this system inefficient and think it produces an unreasonable amount of waste. Clear white pine is not cheap these days. So, when I get a work order for curved jambs, I'm doing them differently.


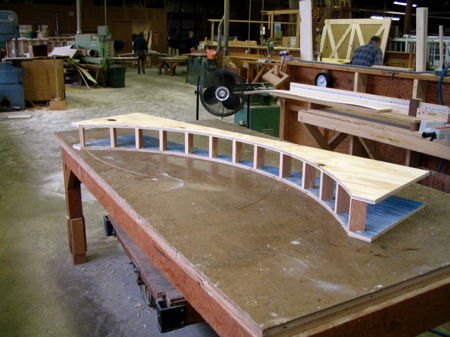
Specifically, I'm using bending ply and forms. In this picture you see the beginning of the concave half of a set of bending forms for one of the arches I'm making. I use a router with an arc-cutting jig to cut the radius into a blank of cheap ply material. I then attach that arched blank to a second rectangular blank, bandsaw about 1/16" away from the line of the arc, then flush-trim the second arc so it's a perfect reproduction of the first. I install the blocks between them, cover the whole thing with 3/8" bending luan, then get started on the convex half (not pictured).

More to come in future posts.

Sunday, November 05, 2006

Cupolas (Finally) Fly the Coop

Well, the cupolas are done. I didn't post for a while because things got kind of crazy at the shop a few weeks ago. One of my coworkers sustained a completely hideous injury, and it was all I could do to show up and get my work done for a while thereafter. I'm going to try to recreate some of the more interesting steps in the cupolas' construction between my last post and the present.

Click here to see a video of the cupolas leaving the shop.


Here's a mockup of the basic structure I designed for the roof framing. The central, short octagonal column provided a convenient way to join the rafters together. The cleat you see on the left-hand side of the rafter was glued to the column, and the rafter was glued to the cleat. That way, if the steel fasteners ever rust away, there should still be a good glue connection between the parts.


This photo shows the final central columns with cleats attached. I thought they ended up looking like gears.


I needed a 59 1/2 degree cut on one end of the rafters, but since my cutoff saw only goes to 55 degrees, I had to make the jig you see above. It basically added the additional 4 1/2 degrees and provided a length stop as well.


I figured out how much overhang the roof bases were meant to have over the face of the posts and marked that distance at each corner of the bases. I used a sharpie for one of these marks so you could see what I was talking about.


I registered my mark on the underside of the bases with their proper location with regard to the post faces. I didn't spend much time photographing this step because it didn't seem all that interesting. Suffice it to say that the roof bases were secured to the posts with long lag bolts.


With the roof bases secured to the posts, I was ready to begin installing the rafters as you can see above.


Here are the completed cupola frames.


Once framing was complete, the next step was to make and install the louvers. I'm not going to go into the louver-making process right now because it was so mind-crushingly dull that it pains me to think about it. Here are a few relevant details, though. There were 17 louver slats per side, 8 sides per cupola, and 5 cupolas. That makes 680 slats. Each slat was connected to its frame with four stainless steel screws. That's 2720 screws that I had to install. B-O-R-I-N-G! Somebody, please get me an apprentice, and soon!


The final steps were sheathing the roofs and applying the facing trim. Making the roofing panels was probably interesting enough to merit documentation, but by then I'd reached the point of just wanting to get these things done, so I didn't drag the camera out every few minutes.